
Shelter Building Basics
If you’re out in the wild, knowing how to throw together a safe haven can make or break your day—or even your health. Let’s talk easy-to-remember tips for setting up camp in the woods.
Prioritizing Warmth and Dryness
First things first: Stay warm and dry! Get the shelter going pronto—yep, before even lighting that fire. Cold, wet weather? That’s a fast track to feeling miserably sick. I once thought a high roof would keep the rain out but learned the hard way that it’s like inviting the weather in for tea. Keep the roof low and snug, and you’ll thank yourself when it starts pouring.
| What Matters | What to Think About |
|---|---|
| Staying Warm | Use anything that keeps the wind out and warmth in. |
| Staying Dry | Top-notch roofing and a dry platform keep you cozy. |
Essential Shelter Components
Take a leaf out of survival pro Tom Elpel’s book—there are four things your shelter can’t skip: waterproofing, fire, insulation, and windproofing. Nail these down, and you’re golden (Yost Survival Skills).
- Waterproofing: Keeps the rain at bay.
- Fire: Not just for s’mores—keeps you warm and cozy.
- Insulation: Wraps up your shelter heat like a burrito.
- Windproofing: Keeps those nasty winds from chilling your bones.
Get the hang of these, and building in any forest gets a whole lot easier. Use what’s around you, and keep an eye on the clock—that last part can be tricky especially when the sun starts dipping. Check out our diy woodland shelter guide or wilderness shelter building techniques for more handy tips.
Shelter Location Considerations
Picking the perfect spot for your shelter can mean the difference between a cozy night or waking up shivering or soggy. Whether you’re an outdoor enthusiast or just testing your survival skills, smart shelter placement protects you from Mother Nature’s surprises.
Choosing the Ideal Location
First things first—find yourself a safe, even ground to set up camp. You don’t wanna wake up rolling downhill! Keep an eye out for those sneaky “widow makers”—dead branches that threaten to drop like bricks from above. Also, think about the sun and wind. Too much sun will turn your shelter into a sauna, while wind can chill you to the bone. Oh, and if you’re planning a campfire, keep it close but not that close. (The Survival Mom)
Handy Tips for Shelter Spotting:
| Thing to Consider | Why It Matters |
|---|---|
| Flat Ground | Prevent nighttime rollouts while you sleep. |
| Safety Hazards | Watch out for falling logs or potential floods. |
| Sun & Wind | Keep comfy by positioning smartly. |
| Animal Highways | Avoid their paths to skip unwanted encounters. |
Importance of Proximity to Water
In the wild, having water nearby is like hitting the jackpot in a survival game. Trekking more than 60 yards for a sip might leave you spent and thirsty. Close access means no endless runs with water jugs and more time enjoying your camp vibe.
Water Access Nuances:
| What to Keep in Mind | Why Bother? |
|---|---|
| How Close? | Within 60 yards keeps you from tiring treks. |
| Stay Dry | Don’t set up too close to flood-ready spots. |
| Sip Safely | Ensure the water is drinkable and not dodgy. |
By thinking about where you bunk, you turn potential risks into mere afterthoughts and enjoy your wilderness adventure safely. Need detailed tips on building a survival shelter in the woods or wilderness shelter building techniques? Check out our other articles loaded with insights!
Shelter Construction Techniques
Building a shelter in the woods is all about using what Mother Nature’s given you, and making sure you’re not set up on the dirt where it gets all chilly. Here’s how you can make the most of your resources and stay off the ground, where it’s warmer and cozier.
Efficient Resource Utilization
When you’re out in the wild, you want to save your energy and use what’s around without much fuss. Here’s how to get the job done:
- Using Downed Poles: Look for branches already lying around for your frame. This cuts down on time and keeps you from hacking at fresh trees.
- Breaking Poles: Instead of sawing, you can snap poles between two tree trunks. It’s faster and you don’t need fancy tools.
- Leveraging Gravity: Let gravity give you a hand. Design your shelter so the weight is supported by the ground instead of ropes. Fewer ropes, less hassle.
- Creative Angles: Use the angles of the trees and land to your benefit. This adds stability so you won’t need extra supports.
Here’s a quick table to help you pick your materials and tools wisely:
| Material/Tool | Purpose | Efficiency Tip |
|---|---|---|
| Downed Trees | Framework | Use what you find to avoid cutting |
| Natural Angles | Stability | Let poles lean naturally |
| Two Tree Trunks | Breaking Poles | Snap wood instead of sawing |
For some more nitty-gritty tips, check our article on wilderness shelter building techniques.
Getting Off the Ground
Staying off the ground is a game-changer for keeping warm and comfy. The earth can suck your warmth away faster than you think, so it’s crucial to insulate underneath your shelter. Here’s how to do it:
- Insulation Thickness: Stack at least four inches of leaves, pine needles, or anything fluffy beneath you. It works like a charm for keeping you toasty.
- Building a Platform: Raise yourself up on branches or logs to keep dry and insulated. If it’s wet outside, you’re golden.
- Hammocks as Alternatives: No time to build? Sling up a hammock. It’s a quick fix for staying off the cold, hard ground and a good sleep option.
If you want to dig deeper into making a solid base, swing by our guide on simple woods shelter construction.
Nailing the art of shelter building keeps you snug, safe, and ready to face the wild. Get a handle on these techniques, and you’ll be building like a pro in no time. For DIY fans wanting the full scoop, peep our diy woodland shelter guide.
Shelter Design Adaptations
Crafting a reliable shelter in the woods isn’t just about assembling a few sticks and leaves. You’ve got to think about how the environment will mess with your plans. Designing shelters to handle the ever-changing weather and making sure there’s plenty of airflow while keeping things safe is all part of making it out there alive.
Weather-Specific Designs
Your shelter’s got to be tailored to whatever Mother Nature throws your way. If rain’s the problem, you better focus on making that roof watertight and think about raising the whole thing off the dank, soggy ground. Stuff like reed leaves, long grass stems, and tree leaves make for pretty decent insulation, trapping warm air where it belongs (Yost Survival Skills).
| Weather Condition | Design Focus | Suggested Features |
|---|---|---|
| Rainy | Waterproofing | A slanted roof, lift those floors to avoid your stuff going for a swim |
| Cold | Insulation and Fire | Thick walls with insulation, spot-on fire placement for cozy warmth |
| Windy | Windproofing | Build sturdy, wind-facing walls, anchor that baby solidly |
| Hot | Shade and Ventilation | Open vibe, hang some tarps for shade, let the breeze flow free |
When blue lips are a real risk, insulation is your new best friend. A shelter that stands firm against the wind and safely houses a fire can make the difference between freezing and toasty. Let the smoke out without inviting carbon monoxide in (Survival Dispatch).
Ventilation and Safety Measures
Decent airflow means you’re not breathing in anything that might poison you. It’s a must when you’re burning stuff for warmth or food. Vents or smart openings release the smoke but keep the wind and rain from barging in.
Don’t forget, you’re sharing the woods with wild critters. Keep them out with raised structures, robust barriers, and a good layout—nobody wants an animal uninvited.
Here are some tips to keep your shelter safe and sound:
| Safety Feature | Description |
|---|---|
| Ventilation Openings | Small, high-up gaps for air, not bugs |
| Elevated Platform | Lift that shelter away from critters and creepy crawlies |
| Secure Structure | Reinforce walls and roofs against big gusts and wildlife gatecrashers |
At the end of the day, your shelter should be like your best sturdy shoes—it’s gotta match the conditions you’re up against. Every detail, from keeping dry to letting in sunlight, is critical to turn your wooden haven into a snug spot in the rough and tumble wilderness. For more handy info on building shelters, wander over to wilderness shelter building techniques and simple woods shelter construction.
Types of Wilderness Shelters
So, you’re out in the woods—do you go Tarzan and swing from the trees, or do you build a humble abode? Knowing the types of shelters you can cobble together with what’s around you is a survival skill you’ll appreciate. Let’s wander through the jungle of forest homes!
Natural Shelter Options
Way back when, our ancestors were pretty crafty at using what was naturally lying around to stay safe from storms and snooping tigers. These “God-gifted” shelters are still lifesavers today. Here’s the lowdown:
- Caves: Nature’s condo—cozy, weather-proof, but possibly hard to find. You’re set if you stumble upon one.
- Rock Outcroppings: Like mini-caves. These tough-as-nails formations are ace at blocking wind and rain.
- Trees: Ever cuddle under a pine? They’re not just for Christmas! Their branches make for decent shelter when jumbled up carefully.
Besides playin’ cave dweller, you can whip up your own shelter with stuff lying around the woods:
| Natural Shelter | What’s the Buzz |
|---|---|
| Debris Hut | Use leaves for a crunchy but warm home. |
| Wigwam | Native American genius at work—dome home, cozy and stable. |
| Wickiup | Quick to make, plop some branches together, toss grass on top, and you’re set. |
| Snow Caves | Dig into a snowbank for an igloo-like experience. |
| The Quinzhee | Snowball yourself a cozy snow hut without an engineering degree. |
These natural hideaways can be your first step in saying “bye” to the weather!
Temporary vs. Long-Term Shelters
Whether you’re just popping by or settling in, know what kind of roof over your head you’re aiming for:
- Temporary Shelters: Fancy a quickie set-up? These spots are easy on effort and high on instant gratification:
- Lean-to: Simple logs tipped against something solid—no hard hat required (Outdoor Life).
- Tarp Tipi: Channel your inner A-lister, fling up a tarp for a fast spot of shade (Outdoor Life).
- Long-Term Shelters: Staying for a while? Build something posh:
- Round Lodge: A cozy cabin vibe. Perfect for adding firelight ambiance without smoke in your eyes.
- Wickiups or Thatch Shelters: Built like a tank. Lovely insulation and they blend right in with Mother Nature.
Whether you’re hunkering down for a minute or the long haul, picking the right shelter is key to not sleeping in a puddle. For more on building up your bushcraft brilliance, check out wilderness shelter building techniques and diy woodland shelter guide.
Creative Shelter Solutions
Building a place to crash among the trees requires a bit of imagination. With a dash of creativity, you can turn the great unknown into a cozy place to chill. Embracing what Mother Nature supplies, and thinking outside the box, can lead to comfy hideouts.
Making Do with What You’ve Got
When you’re out there, sometimes the ideal tools are just a dream. So, you’ve got to roll with whatever’s lying around. Ever thought about using plastic sheets, rain ponchos, or even hefty trash bags to build your den? They’re your go-to friends in a pinch (LinkedIn).
Thinking on your feet could mean rigging up a tarp hammock. It’s a snazzy way to dodge wet ground and creepy crawlies. Just sling an 8×10 tarp between two sturdy trees with some trusty nylon rope, and you’ve carved out a pretty sweet hangout. Throw in some extra tarps for a makeshift roof.
Here’s a quick list of things you might’ve overlooked but could be your saving grace:
| Material | Possible Use |
|---|---|
| Plastic Tarps | Roof, wind shield |
| Ponchos | Rain cover, makeshift walls |
| Trash Bags | Catch water, keep warm |
| Branches | Support, building bones |
Building Outside the Norm
Thinking out-of-the-box when setting up a hideaway can totally pay off. Classic shelters like lean-tos or brush huts made from what’s right in front of you can be surprisingly sturdy. Where you put your shack matters—think about sunlight, wind, and a spot for a safe fire (The Survival Mom).
Use what’s around you to boost your shelter—need some walls? Try stacking leaves or branches. They’ll keep you snug and hidden from both nosy critters and wandering people. And hey, setting up reflectors using logs can bounce back heat to keep things toasty, while the fire stays safely outside (Yost Survival Skills).
Don’t forget unwanted guests! Critters can be a real buzzkill, so spray down your area with bug-off products like Cedarcide or Wondercide before you start building.
By smartly using what’s at hand and trying out new tactics, your chances of setting up a snug and robust shelter in the wild skyrocket. Want more pro tips on survival setups? Check out our guides on building a survival shelter in the woods and wilderness shelter building techniques.
Specific Shelter Designs
Cranking out a decent shelter in the woods might just be the game-changer you need when you’re out there fending for yourself. Think of two standout styles: the straightforward lean-to and the chilly-proof snow shelter – each has its own spell for different weather vibes.
Lean-to Shelter Construction
Lean-tos are like the fast-food of survival shelters—quick, easy, and gets the job done in less than an hour. You’re looking at basic stuff for materials but it’s like a magic umbrella against wind and rain, a lifesaver when you’re in a pinch (Outdoor Life).
Here’s the skinny on making one:
- Pick Your Spot: Hunt down a flat patch that’s got a shield from the wind. A clump of trees or some rocks are your perfect buddies for extra muscle.
- Round Up Your Gear: Bag a bunch of long, hearty branches for the frame, then grab smaller ones or a heap of leaves for the roof bit.
- Set Up the Frame: Prop the hefty branches against a solid tree or rock, making a triangle.
- Fill in the Blanks: Jam those gaps with smaller branches, crispy leaves, and whatever fluff you can find to keep the chill out.
- Entry Way: Leave a gap to crawl in but make sure you’ve covered up enough to battle the gusty winds.
| Material | Purpose |
|---|---|
| Long branches | Frame backbone |
| Smaller branches | Roof and filler |
| Leaves/debris | Draft blocker |
Snow Shelters and Hot Rock Heating
When everything’s turned into a snow globe, a snow shelter’s your answer for staying toasty and safe. Just beware of things like low oxygen levels and the roof caving in. The trick here is digging into a snowbank and creating your icy castle.
Here’s the drill for a snow shelter:
- Scope Out a Spot: Look for a good, deep snow pile that’s out of the way of avalanche zones.
- Start Digging: Carve a tunnel into the snow, opening it up into a snug spot to catch some Z’s.
- Craft a Sleeping Nook: Mold a nice, comfy shelf in your igloo interior for resting.
- Breathe Easy: Pop a small hole in the roof to let in fresh air and avoid the no-air scare (Outdoor Life).
To keep your snow hut homely without risking an indoor bonfire, there’s the hot rock heating trick:
- Dig a Hole: Make a tiny pit inside your snow digs.
- Rock Toasting: Get some big rocks to sizzle on a fire outside.
- Rocks Go In: Once they’re piping hot, plunk them into your pit.
- Lock the Warmth: Cap it with a flat stone to kind of slow-release the warmth (Outdoor Life).
Get comfy with these shelter setups and you’re well on your way to keeping cozy and safe when nature throws curveballs. Eager for more tricks up your sleeve? Check out wilderness shelter building techniques and get the lowdown on building a survival shelter in the woods for some nifty ideas and pro pointers.
Shelter Best Practices
Crafting a sturdy spot to rest your head when you’re in the wild isn’t just about skill; it’s about learning from slip-ups and being ready to throw something together on the fly if needed.
Past Mistakes and Learnings
Let’s dive into the bloopers of past shelter attempts. You know, those times when a shelter just couldn’t hack it, like when building that sky-high roof that turns into a rain funnel instead of a shield. A little story from my memory lane (thanks, Survival Dispatch) taught me that when rain decides to pour, a low roof is a happy roof.
Some not-so-great moments and what we learned:
| Oopsie Moments | Takeaways |
|---|---|
| Roof too far from the ground | Keep it low to say goodbye to leaks! |
| Came back empty-handed on supplies | Think outside the box and make do with what’s at hand. |
| Picked a rubbish spot | Scope out the scene before settling down. |
| Forgot to keep warm | Chuck some insulation in there; comfort is key. |
By keeping these tidbits in mind, you’ll dodge headaches and keep cozy through the night.
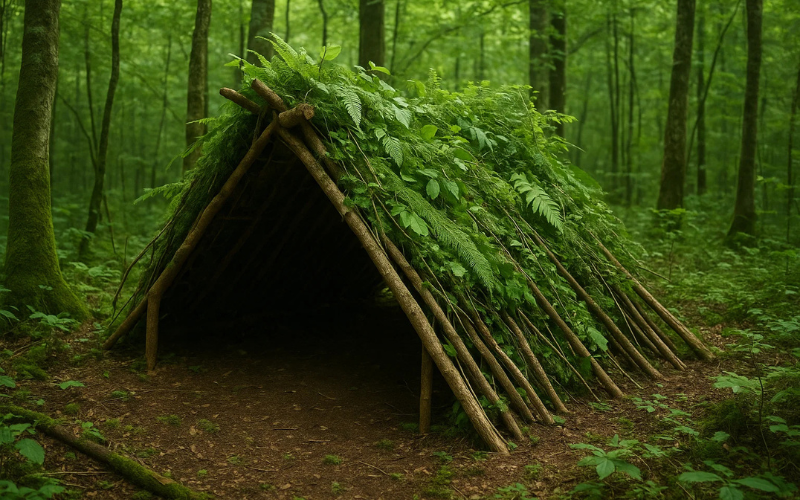
Quick Shelter Builds in Emergency Situations
When Mother Nature’s throwing a curve ball your way, speed is your best buddy. With a little ingenuity, you can whip up a shelter using what’s in your vicinity. Picture this: a resourceful soul managed to create a snug spot under an ancient apple tree, all in a cool hour and a half. The trick? A low-lying ridge pole, sturdy branch frame, and grass roofing made sure they weren’t drenched when skies opened up (Survival Dispatch).
Here’s how to build fast:
- Snap up fallen branches for the structure—less chopping, more building.
- Lean on trees or use gravity to prop things up without cutting much rope.
- Turn unusual supplies into shelter saviors: think plastic tarps, ponchos, or that giant trash bag stashed away for rainy days (LinkedIn).
- Stick to simple designs—cover the essentials, save strength for the wilderness marathon.
These nuggets should help you whip up shelter on the fly, keeping you snug no matter what surprises the wild tosses your way.
For step-by-step blueprints on how to create shelters that really stick, check out our articles on building a survival shelter in the woods and wilderness shelter building techniques. If you’re after a less-complicated approach, our simple woods shelter construction and diy woodland shelter guide are jam-packed with useful info for any outdoor enthusiast.