Importance of Basic Survival Skills
Basic Survival Skills are essential for anyone stepping into unpredictable wilderness. Staying alive in the wilderness isn’t just a bonus—it’s a necessity. The biggest dangers usually aren’t wild animals or raging rivers, but a lack of preparation and poor decision-making. That’s where Basic Survival Skills come in. Knowing how to stay calm, find shelter, and manage limited resources can make all the difference. Many people run into trouble simply because they panic or ignore the basics. Mastering Basic Survival Skills helps you avoid common mistakes and gives you the confidence to handle tough situations when they arise.
Wilderness Survival Fundamentals
Getting the hang of basic survival skills can make you feel like MacGyver in a pinch. It’s all about keeping your cool and handling your priorities like a pro. The folks at the U.S. Air Force have a solid list to go by: keep your spirits up, fix any cuts or scrapes, find some cover, spark up a fire, yell and wave for help, drink up (water, that is), and don’t sweat the grub till later.
| Survival Rule | Description |
|---|---|
| Positive Mental Attitude | Keep your cool and think things through. |
| First Aid | Patch up any wounds before they get worse. |
| Seek Shelter | Keep the weather off your back—first thing’s first. |
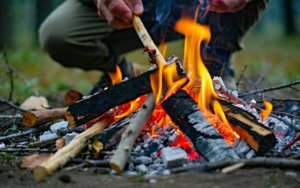
| Build a Fire | Get warm and make yourself seen. |
| Signal for Help | Make some noise to get noticed. |
| Drinking Water | Find and clean water faster than you can say “parched.” |
| Food | Worry about munchies only after the essentials. |
According survival guru, is all about the shelter game. Losing body heat is a top way to get into serious trouble, so making a cozy hideout is lesson number one of basic survival skills. Shelters keep the rain, wind, and chill at bay and are your first defense against hypothermia. Whether you’re piling up leaves or firing up a makeshift stove, the key is to keep comfortably toasty.
Water First: Basic Survival Skills Tricks for Off-Grid Living
Speaking of necessities, finding water should hit the top of your to-do list when luck runs out. Three days without it, and you’re in trouble. Boil that stuff for a solid five minutes to send those nasty bugs packing.
So, if you’re serious about heading off the grid, knowing these basic survival skills tricks is your ticket to the great outdoors. Check out more bites of wisdom with outdoor survival tips, fire starting techniques, and basic first aid skills to give yourself a leg up before exploring Mother Nature’s backyard.
Personal Locator Beacons for Distress

If you’re heading out into the sticks where civilization’s just a rumor, a Personal Locator Beacon (PLB) is like a lifeline you didn’t know you needed til you almost didn’t have it. These nifty little gadgets can haul your bacon out of the frying pan when things get dicey. Knowing how to get your PLB up and running can make the difference between a close call and a catastrophe when you’re out there playing.
First things first, after getting your hands on a PLB, you’d better give a shoutout to the National Oceanic and Atmospheric Administration (NOAA). Registering your device with them is like giving a heads-up to your personal rescue crew. If trouble knocks, they’ll know who you are and who to call, super quick. Here’s the lowdown on what they need from you:
| Thingamajig | What’s It For? |
|---|---|
| Owner’s Name | Your full name, not your trail nickname. |
| Address | Where you hang your hat when not hiking. |
| Emergency Contacts | Folks who can say, “Yep, that’s them!” if you hit the SOS. |
| PLB Serial Number | The one-of-a-kind ID tagged on your gadget. |
Sending an SOS When Every Second Counts
Once you’ve squared all that away, using the PLB is like a breeze in the woods. In a jam? Smash that button hard enough for it to register. Bam, your SOS goes into the sky, hitching a ride on a satellite, yelling, “Come get me!” instantly giving rescuers your geo-coordinates. (Hunter-ed).
Folks who’re out there in nature’s backyard should get cozy with their PLB before setting foot on any trail. Make sure you know how it ticks—battery life, what buttons do what, and other can’t-miss details so when you need it, you don’t hesitate. It’s smart to partner your PLB know-how with a few survival tips in your back pocket, like getting a fire going or patching up boo-boos. Having these basics down pat means you’ll be ready for whatever Mother Nature throws your way.
Seven Rules for Basic Survival Skills
U.S. Air Force Guidelines for Basic Survival Skills
The U.S. Air Force’s got some go-to tips for keeping cool and composed when you’re out there in some wild situation. These not-so-secret survival rules help you get your priorities straight and boost your odds when you’re roughin’ it. If you love being outside, then knowing these tricks can make a real difference.
| Survival Rule | Description |
|---|---|
| 1. Keep Your Spirits Up | A positive attitude can be the difference between thriving and just hanging on. |
| 2. Patch Yourself Up | Giving yourself some medical love is clutch for staying in good shape. |
| 3. Find a Roof Over Your Head | Shelter’s your shield against whatever Mother Nature throws at you. |
| 4. Spark a Flame | Fire is your friend for warmth, chow, and drawing attention for help. |
| 5. Make Some Noise | Make yourself hard to miss, so help can find you faster. |
| 6. Guzzle That H2O | Staying hydrated ain’t optional, it’s a must. |
| 7. Don’t Fret About Food | Put first things first—water and shelter top the list before you worry about snacks. |
These rules make it clear: while you need food, you can hold off a bit on that. Water and staying sheltered are more pressing concerns. Bear Grylls, the survival legend himself, said something like, “You can last longer without a meal than a drink of water”.
Golden Rules for Staying Safe and Seen in the Wild
Bear also hammers home the need to stand out for rescue teams. Think bright SOS signals and sticking close to where you got stuck—wandering around won’t help search teams find you any faster.
The guidelines stress putting safety first—get out of harm’s way when it comes to bad weather or hungry critters by finding or making a snug shelter.
These seven simple rules offer a game plan for surviving sticky situations, helping you make smart choices. Get the hang of these skills, and you’ll be better prepped for whatever the wild throws your way. For more explanations, dive into outdoor survival tips or snag some basic first aid skills.
your social circle, ready to tackle both the great outdoors and the virtual jungle.
Water Purification in the Wilderness
Finding safe water to drink is a top priority when you’re out in the wild. Rivers and lakes might look inviting, but they could hide dangers like dead animals, waste, or tiny beasts you can’t even see. For those who love the great outdoors, knowing how to clean up that water can be a lifesaver.
Steps for Safe Drinking Water
To turn sketchy water into a safe sip, there are three main steps to tackle: clean it, sterilize it, and make it look and taste okay. This trio of tasks helps make sure all the gunk is gone from your drink.
| Step | How It Helps |
|---|---|
| Clean | Kick out the big junk. |
| Sterilize | Wipe out the nasty bugs with strong tactics. |
| Make It Pretty | Clear it up so it looks good and tastes fresh. |
- Clean involves taking out the big chunks. You can scoop water that looks clearer to start with, or strain it through whatever cloth you’ve got handy, like a trusty t-shirt, to ditch the debris.
- Sterilize means destroying the tiny troublemakers. Boiling’s the go-to choice—keep that water rolling for a minute, or bump it to five if you’re way up high in the mountains. There are other tricks too: sprinkle in some iodine or a splash of bleach, zap it with UV light, or set up a solar still to get water by evaporation.
- Make It Pretty involves fine-tuning its clarity and taste, usually using fancy filters. Ideally, aim for a filter that catches particles down to 0.22 microns, which is small enough to nab viruses and sneaky bacteria.
Methods of Water Purification
In a pinch, there are several ways to clean up your drinking water
| Method | What You Do |
|---|---|
| Boiling | Boil water until it bubbles hard—a good solid minute will do. |
| Chemical Treatment | Drop in iodine or bleach to knock out germs. |
| Gravity Filters | Use handy gadgets like a Sawyer Mini or LifeStraw to do the filtering work. |
| UV Light | Shine UV light gadgets on the water to zap germs dead. |
| Solar Still | Set up a sun-trap to turn vapor back into drinkable water. |

If your kit’s lacking, nature’s got your back with cloth, sand, rock, or burnt wood to sift out the muck. When putting these DIY filters to work, always boil the water after to make sure it’s safe.
Before heading out into the wild, do a bit of homework on where your water’s coming from and what’s floating in it. Packing different water-purifying gear can help you handle whatever the wilderness throws your way. Curious about more outdoor survival hacks? Check out our guide on outdoor survival tips.
Shelter Building in Survival Situations
Building a solid shelter is one of those crucial skills everyone should have in their back pocket. It’s your shield against Mother Nature’s mood swings, keeping you dry when she cries and warm when she blows. Plus, having a safe place to crash helps keep your head straight when things get a little dicey outside.
Essential for Protection
When it comes to wilderness survival, a good shelter does more than just sit there looking pretty. It’s supposed to stand between you and all the nasty weather waiting to ruin your day. You want something that’ll keep the wind out and is waterproof if the skies decide to open up. Try to whip this up in about 15 minutes so you can move on to other stuff like gathering firewood or getting yourself some insulation.
Now, where to set up your cozy little hideaway? Here’s what you should consider:
| What to Look For | Why it Matters |
|---|---|
| Widowmakers | Stay away from trees with dead branches—those’ll ruin your picnic fast. |
| Wind | Find a spot that’s not a wind tunnel. |
| Water | Close to water is good, but don’t pick a spot that might flood. |
| Wood | Need materials for building and making a cozy fire. |
| Ground | Flat ground’s best, and if you can, wake up with the sun in your face. |
Choosing the right spot can make your shelter feel like five-star digs while keeping you safe and snug.
Types of Survival Shelters
Depending on where you are and what you’ve got on hand, there are a few shelter styles to consider:
- Lean-To Shelter: Basically, stack some branches or logs against a tree or rock. Not fancy, but it’ll do the trick.
- Debris Hut: Make a frame with sticks, then go nuts with leaves and stuff for insulation. Great if you’re somewhere chillier.
- A-Frame Shelter: Like a lean-to, but in a triangle shape. More stable, especially if it gets windy.
- Tarp Shelter: Got a tarp and some string? You’re golden. Quick to put up and take down—super flexible for all kinds of places and weathers.
- Snow Cave: If you’re in a snowy wonderland, dig a cave right out of the snow. Keeps you warm and near water.
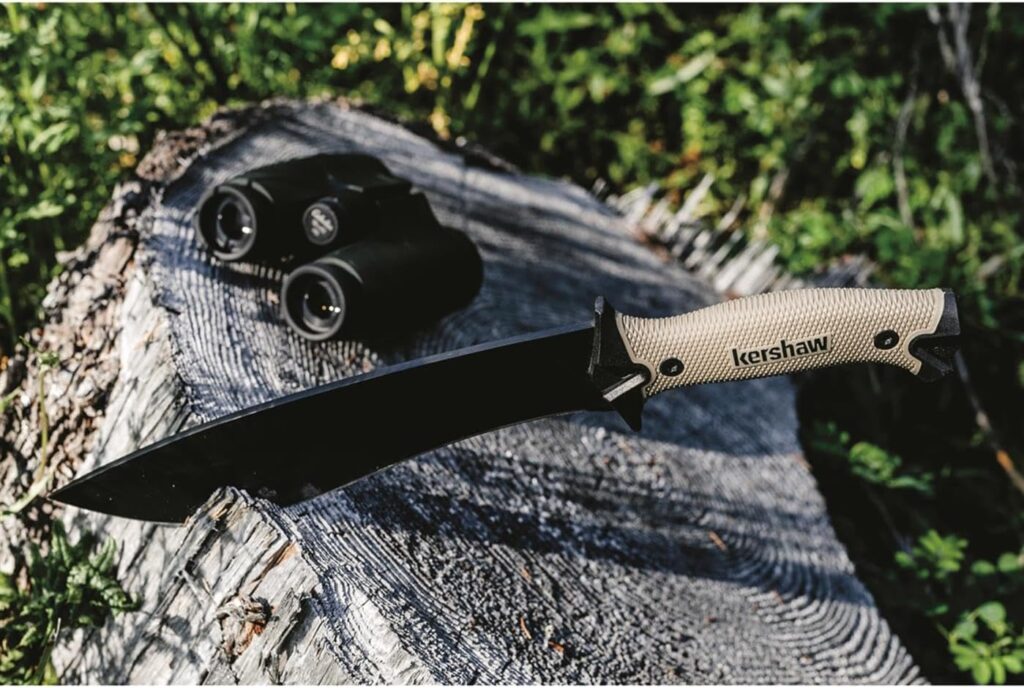
Carrying a few basics like a waterproof sheet, some rope, a solid knife, tent stakes, and bungee cords can make building a shelter a breeze. Especially important is that waterproof sheet—finding something leak-proof out there can be a tough ask.
Mastering these shelter types, whether throwing together a lean-to or putting the finishing touches on a debris hut, is key for anyone headed into the wild. For more on handling the great outdoors, check out our articles on fire starting techniques and basic first aid skills to stay prepared for anything survival scenarios throw your way.
Fire Starting Techniques
Fire’s a game-changer out in the wild. It gives you warmth, scares away the creepy crawlies, and lets you whip up a hot meal. Knowing how to get a fire going without a lighter or matches is a big deal. Let’s chat about two classic ways: rubbing sticks together and using the sun.

Friction-Based Methods
Rubbing sticks to start a fire is old-school cool but not the easiest trick to pull off. Here’s the wood you want for this: cottonwood, juniper, aspen, willow, cedar, cypress, and walnut. Each has its perks for getting the heat cranking high enough to make a spark.
One nifty way is the bow drill technique. Basically, you’ve got a stick—your spindle—spun between a flat board and a curved stick (the bow). This setup makes sparks fly by upping the spin and force, handing you that tiny bit of fire on your tinder.
| Wood Type | Suitability | Comments |
|---|---|---|
| Cottonwood | High | Perfect pair for spindle/board |
| Juniper | High | Catches fire like a pro |
| Aspen | Medium | Light and flexy |
| Willow | Medium | A breeze to use |
| Cedar | High | Smells good and burns hot |
| Cypress | Medium | Feathers up into kindling nicely |
| Walnut | High | Tough and gets the job done |
If you’re keen on becoming a fire-starting wizard, give these different ways a shot. You’ll thank yourself when you’re out in the field.
Lens and Sunlight Ignition
Think you need matches to light a fire? Not necessarily. A lens is your new best friend. Got a magnifying glass? Maybe just some glasses or the lenses from binoculars? They all focus sunlight to a tiny point that can light your tinder.
Believe it or not, you can even use a water-filled balloon or ice shaped like a lens. As long as the sun’s throwing down the rays, you can turn almost anything transparent into a fire starter. Just needs a little finesse and patience.
| Item | Effectiveness | Notes |
|---|---|---|
| Magnifying Glass | High | Sunlight’s best buddy |
| Eyeglasses | Medium | Works with some focus and luck |
| Binocular Lenses | High | Sun magnets, pretty much |
| Balloons (filled) | Variable | Needs clear water and bright sun |
| Ice (shaped) | Variable | Craftsmanship required |
The more you practice these, the more you’ll feel like a fire-starting guru. For the kiddos, there are beginner survival tips to get them started on their outdoor journeys. Getting a handle on these techniques is just the beginning of your wild adventure skills.
Priorities of Basic Survival Skills
Basic Survival Skills Advice
Survival knows no bounds, and Bear Grylls, a name we know when the great outdoors gets complicated, has surely made that clear. This survival whiz lays out priorities that can be life-savers when you’re up against Mother Nature.
| Priority | Description |
|---|---|
| 1. Protection | First thing’s first: you’ve got to defend yourself against anything that might harm you, like wildlife or harsh weather. Secure a spot that shields you from the nasties out there.(Outdoors.com). |
| 2. Visibility and Rescue | Next up, you need to make sure somebody can find you. Think flashing signals, staying put, and sending an SOS—simple but effective ways to get noticed by those who can help (Outdoors.com). |
| 3. Water | Can’t go without it for long—Bear says there’s no more than a three-day clock ticking without water. So, making sure you’ve got what you need to stay hydrated comes right after sorting out protection and getting spotted (Outdoors.com). |
| 4. Food | Less urgent than water, but eat you must! Berries, bugs, whatever you can find to keep up your energy reserves when things go sideways (Outdoors.com). |
Keeping your head is half the battle—freaking out never helps when you’re high and dry in a sticky situation. Bear would tell ya, quick thinking and a calm approach will go a long way in getting you through it.
Getting clued-up on basic survival skills is a smart move for adventurers and outdoor lovers alike. Because let’s face it, knowing a thing or two about fire starting techniques or mastering basic first aid skills can save your bacon if things go pear-shaped. Need more down-to-earth advice? Check out our outdoor survival tips for on-the-ground know-how when roughing it gets real.